10/28/24
Week 8: Push for Finalization

Veronica Ramirez- Composite, Bomin Kim- Condensation FX, Zach Jantz- Smoke FX, Jenson Dantes- Lighting, Lookdev
Addressing Feedback
Last week, much of the focus was placed on polishing our effects to promote the sense of realism- which, this week's iterations were no different. However, based on the feedback from the mentors at the Mill, here were some of the main adjustments to focus on:
-
Either in CG or in comp, add depth of field to the shot inside chest
-
Alter the lighting of the cans, especially the main highlights
-
Subtle changes to shaders of coins
-
Update shipwreck rope/sail animation
Updating Shipwreck
To address these points, I first began the week by finishing the animation of the ropes and sails swinging, as I knew it would be the most time consuming of the tasks. Last week, I used Blender's soft body simulation in order to achieve this look, however this week I approached this using cloth simulations instead. Soft body simulations, I have learned, are typically a poor option if you want the mesh to remain more rigid, therefore with non-stretchy surfaces like cloth and rope, cloth simulation was a better route to take.
By creating a vertex group labeled "pin", and assigning vertices interacting with the wood supports, I was able to then use two wind force fields to mimic the natural flow of wind I observed in references. I chose to have two wind fields- one that pushes the sails, the other that pulls. Then, by keyframing their strength based on sin waves, I could have either force fade out while the opposite increases in strength, meant to invoke the turbulent flow of the air.


The playblasts shown here were created in Houdini, after I exported alembic caches from Blender to test the conversion across different software. I also needed to have the alembic cache as my finished render was completed in Maya's Arnold, therefore the scene, material assignments and lighting were done in Maya.

Veronica Ramirez- Composite, Jenson Dantes- Lighting, Lookdev
Iterating Product Shot
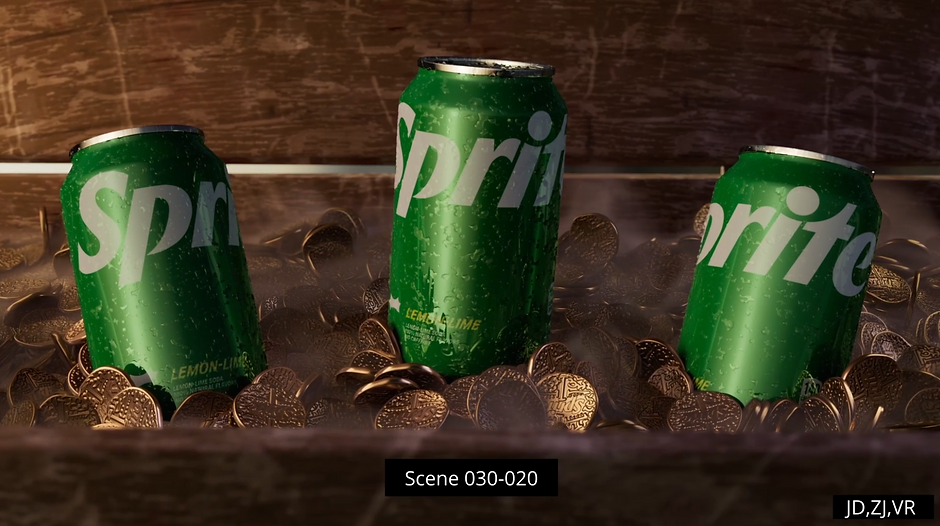
Some of the other feedback given from the mentors as well as our professors had to do with our shot displaying inside of the chest. The main problem outlined throughout our discussion was that the cans looked "cut out" of the frame, as if they were pasted on. Which, they were-- and adjustments needed to be made to fix this. Because the cans and chest were lit and rendered separately and combined in comp, it was difficult to blend the two scenes together. Through subtle adjustments like warming the light of the can highlight, copying temperature values, the cans gave more of the impression that they were actually in the chest.
However, when it came to the lighting of the chest itself, including the coins and smoke, our group decided to keep our previous week's version of the render. I experimented with covering the little window between the chest and the lid, but our group agreed the shot felt too closed off and overall less inviting. I did, however, appreciate the subtle green reflection in the coins that helped blend the coins and can together, but for this week, ultimately we kept the previous versions.
Current week
Previous week


Final Comp

