
Week 4: Locking Cameras, Lighting Progress
1/27/25 - 2/2/25
Mentor Feedback
This week, our group presented our latest version of our previsualization as well as some shader and asset progress. From the meeting with the mentors, here were my main notes to address:
Kyle:
- Increase the zoom or bring camera closer to the flower in shot 2
- Consider combining shot 4-5 or adjust rotation
- Reframe last shot to allow for better logo positioning
Molly:
- Bring in more dynamic elements, maybe in bottle rotation or camera movement in shot 5
- Potentially, energy and dynamic element could be enhanced through lighting and interesting refraction
Vi:
- Similar notes from the rest of the group, editing pacing and composition
Hailey:
- Similar notes about shot 5, needing a sense of movement or more interesting flow
Addressing Feedback
From these notes from the mentors, the main things I wanted to focus on are fixing our previz and making sure our cameras are locked this week. Here are my main tasks regarding the previz edits:
- Shot 1: No change
- Shot 2: Bring camera closer to the flower as mentioned
- Shot 3: More dynamic camera movement, maybe in editing we can remap speed
- Shot 4: Adjust camera angle slightly, maybe a change in speed as well
- Shot 5: Focus on bringing in faster movement, whether in the bottle, camera, or other elements
- Ending shot: More subtle movement and composition change to accommodate for logo
With these notes, I worked with my team to create a new previz edit, keeping as much of the original edit as possible. Our team also created a second previz video based on feedback from the professors.
New Previz based on Mentor Feedback, slices shot 5 into 2 quick cuts

New Previz based on Professor Feedback, combines last 3 shots

Shader Development
This week, I also wanted to continue developing the shaders for the perfume bottle to better develop the lighting for each shot. Last week, I dove into the elements of transmission called transmission depth and dielectric priority; this week, I looked into dispersion abberation. This property controls the dispersion of different wavelengths of light as they pass through the transmissive object, resulting in the effect of more color variation along the edges of the refraction.


Disp Abbe* = 0
Disp Abbe* = 0.05
Disp Abbe* = 0.1


Disp Abbe* = 0.5
Disp Abbe* = 1
Disp Abbe* = 5
While testing abberation on the spheres, I wasn't seeing any visible difference between 5 and any higher number. In Arnold's documentation, a value of 10 to 70 can be applied for glass and diamond shaders. So, after switching to the bottle itself to test abberation against sharper forms of geometry, I could begin seeing how the higher numbers still continue to effect more rigid surfaces. For the final shader, I will aim to set the abberation somewhere around 50.

Disp Abbe* = 0.1

Disp Abbe* = 0

Disp Abbe* = 0.5


Disp Abbe* = 1
Disp Abbe* = 5
Disp Abbe* = 10


Disp Abbe* = 20
Disp Abbe* = 70
Disp Abbe* = 50
Lighting Progress
Now with an improved shader for the perfume bottle, I began working on lighting for the previz version suggested by our professors. For our ad, we want to emphasize the elegant shape of the bottle and utilize strong highlights and warm tones.
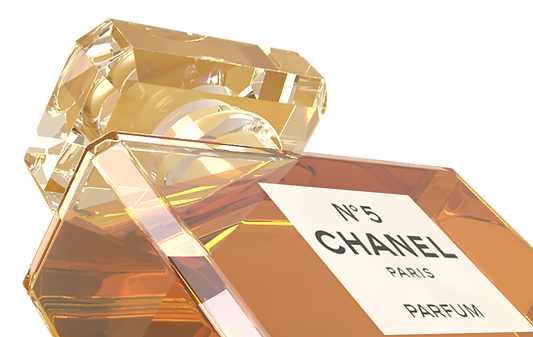
For shot 4, I took an additive approach for the lighting, placing quad lights in the scene and observing their individual effects before enabling the HDRI and other lights. Demonstrated in the photos below, the lights are placed in order to create highlights in different regions of the bottle.
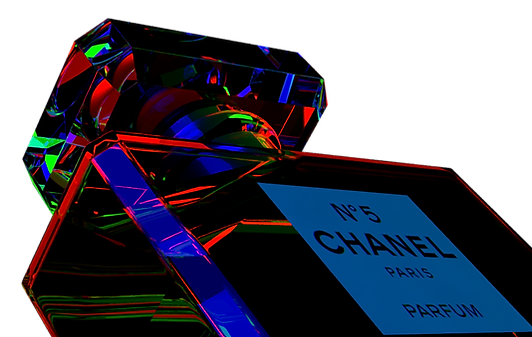
Lights assigned red, green and blue

Lights assigned white
Lights with HDRI enabled
I also worked on shot 5, which is possibly now our final shot. Because this shot includes the bottle in a more detailed environment, and for better control within compositing, I created two ROPs for render outputs / layers: one for the bottle, and another for the environment. I approached the lighting in a similar fashion to shot 4 for the bottle.

Lights with red, green, yellow, blue, magenta, and purple
**Noise coming from transmission samples or light samples, will be addressed in the future**

Lights assigned white

Lights with HDRI enabled

Environment Render with bottle phantomed for reflection

Bottle only render
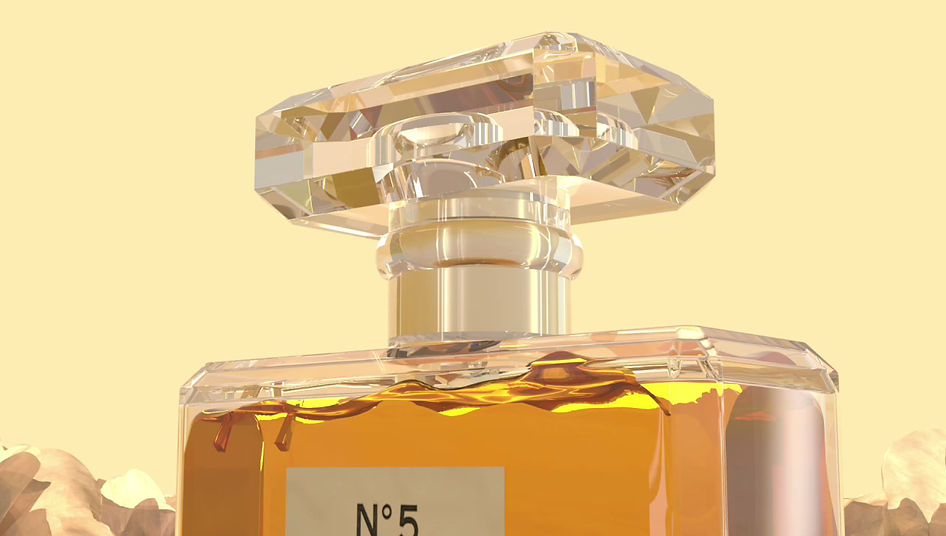
Slap Comp with tan/orange background
The environment seen in the image uses Wei's flower model, Shannon's flower shaders, and Eva's water ripple simulation. The environment is lit with one backlight and two fill lights, maintaining a bright atmosphere but allowing the highlights of the flowers to lead the eyes to the product.
I also utilized light-linking, outlined in Professor Fowler's website, in order to separate the appropriate lighting on the bottle from the environment lights. Using similar temperatures of light also helped to blend the two render layers together, also helping bring out the orange in the perfume liquid.